

LiteLLM
Connect CoffeeRouter through a local LiteLLM gateway and use it from ChatBox.
Request flow
ChatBox
    ↓ local master key
http://127.0.0.1:4000/v1/chat/completions
    ↓ LiteLLM model mapping
https://www.coffeerouter.ai/v1/chat/completions
    ↓ CoffeeRouter API key
MiniMax-M2.7
LiteLLM exposes the client alias coffee-minimax-m2-7, while the actual model ID sent to CoffeeRouter is MiniMax-M2.7. These values serve different purposes and must not be mixed.
01. Prepare and install LiteLLM
Before you begin, prepare:
- CoffeeRouter API Base:
https://www.coffeerouter.ai/v1. - An active CoffeeRouter token and the exact model IDs allowed by that token.
- A directory for the configuration, such as
C:\litellm-coffeerouteron Windows. - Optional: the latest ChatBox for client verification.
LiteLLM 1.84.0 and newer require Python 3.10 or later. The official install script and uv can provision a compatible Python environment automatically.
macOS, Linux, or Windows WSL
LiteLLM marks the following one-command installer as the recommended local and beginner setup:
curl -fsSL https://raw.githubusercontent.com/BerriAI/litellm/main/scripts/install.sh | sh
The script installs litellm[proxy] and may open the general setup wizard. This guide uses a dedicated config.yaml for CoffeeRouter, so you can exit the wizard and continue below.
Windows PowerShell
Native PowerShell normally does not include sh. Install uv, then use LiteLLM's documented uv tool method:
powershell -ExecutionPolicy ByPass -c "irm https://astral.sh/uv/install.ps1 | iex"
uv tool install "litellm[proxy]"
litellm --version
If uv or litellm is not found after installation, close and reopen the terminal.
02. Configure CoffeeRouter and LiteLLM keys
Create .env in the configuration directory:
COFFEEROUTER_API_BASE=https://www.coffeerouter.ai/v1
COFFEEROUTER_API_KEY=sk-your-coffeerouter-key
LITELLM_MASTER_KEY=sk-your-litellm-master-key
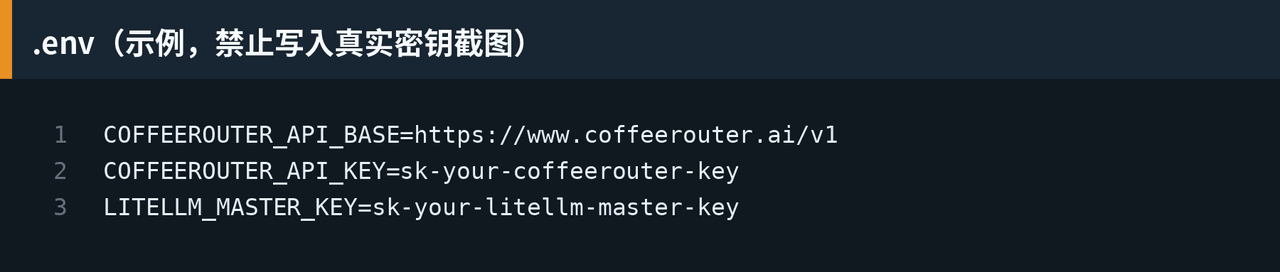
COFFEEROUTER_API_KEYis the upstream token from CoffeeRouter Token Management.LITELLM_MASTER_KEYis a separate password used by clients connecting to local LiteLLM and must start withsk-.- Do not reuse the same value for both keys, and never put real values in
config.yaml, screenshots, or Git.
Add .env to the project's .gitignore:
.env
03. Configure the model mapping
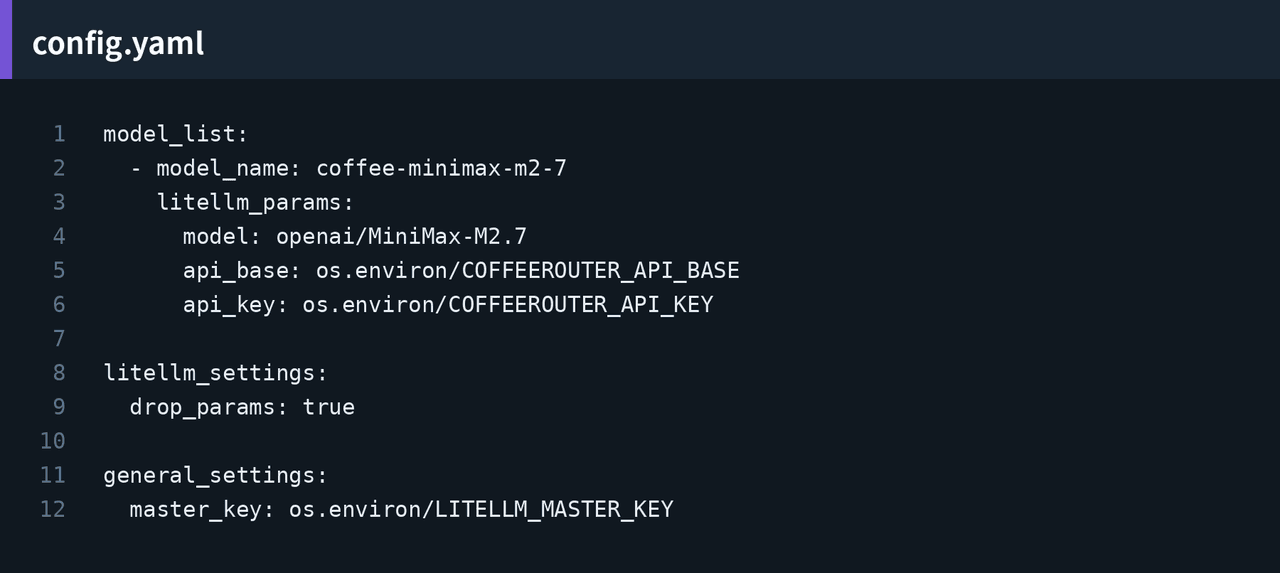
Create config.yaml in the same directory:
model_list:
  - model_name: coffee-minimax-m2-7
    litellm_params:
      model: openai/MiniMax-M2.7
      api_base: os.environ/COFFEEROUTER_API_BASE
      api_key: os.environ/COFFEEROUTER_API_KEY

litellm_settings:
  drop_params: true

general_settings:
  master_key: os.environ/LITELLM_MASTER_KEY
| Setting | Purpose | Example |
|---|---|---|
model_name | Alias used by clients calling LiteLLM | coffee-minimax-m2-7 |
model | LiteLLM provider plus the exact upstream model ID | openai/MiniMax-M2.7 |
api_base | CoffeeRouter's OpenAI-compatible Base URL | https://www.coffeerouter.ai/v1 |
api_key | CoffeeRouter upstream token | Read from .env |
CoffeeRouter exposes an OpenAI-compatible endpoint, so the LiteLLM provider prefix is openai/. MiniMax-M2.7, coffee-minimax-m2-7, and the model name entered in ChatBox must each exactly match their corresponding settings, including case.
To add more models, append entries under model_list:
  - model_name: coffee-your-model
    litellm_params:
      model: openai/your-exact-coffeerouter-model-id
      api_base: os.environ/COFFEEROUTER_API_BASE
      api_key: os.environ/COFFEEROUTER_API_KEY
04. Start LiteLLM locally
Start LiteLLM from the directory that contains .env and config.yaml:
cd C:\litellm-coffeerouter
litellm --config .\config.yaml --port 4000
On macOS, Linux, or WSL:
cd ~/litellm-coffeerouter
litellm --config ./config.yaml --port 4000
Keep the terminal running after LiteLLM reports that it is listening on http://0.0.0.0:4000. Local clients should use the explicit loopback address http://127.0.0.1:4000.
05. Advanced option: run LiteLLM with Docker
Use Docker when you need a background service, server deployment, or container isolation. Skip this section for a simple local setup.
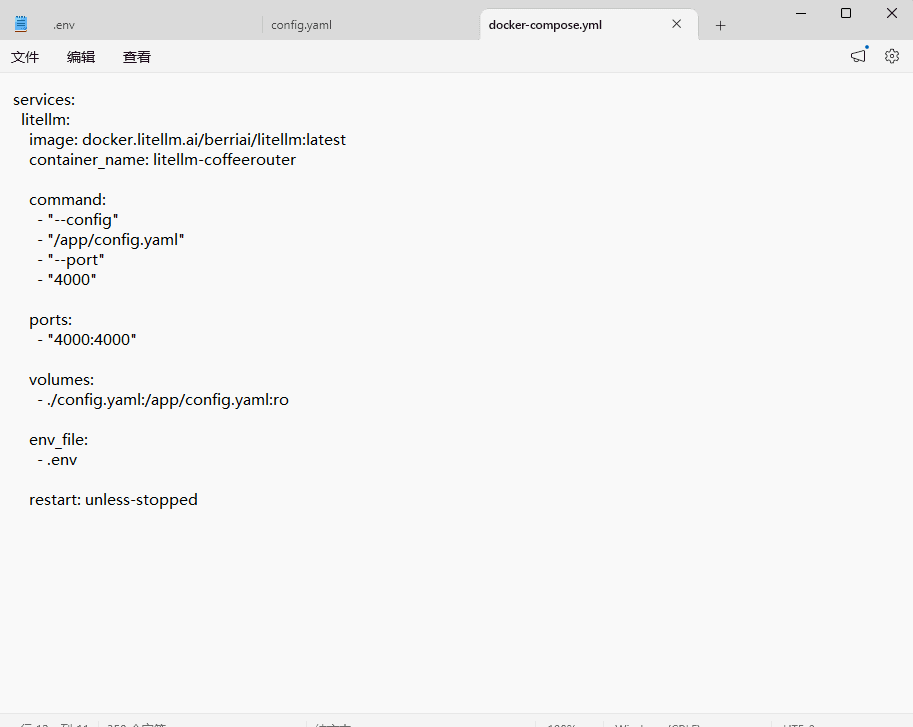
Install and start Docker Desktop first; Windows users should prefer its WSL 2 backend. Create docker-compose.yml in the configuration directory:
services:
  litellm:
    image: docker.litellm.ai/berriai/litellm:latest
    container_name: litellm-coffeerouter
    command:
      - "--config"
      - "/app/config.yaml"
      - "--port"
      - "4000"
    ports:
      - "4000:4000"
    volumes:
      - ./config.yaml:/app/config.yaml:ro
    env_file:
      - .env
    restart: unless-stopped
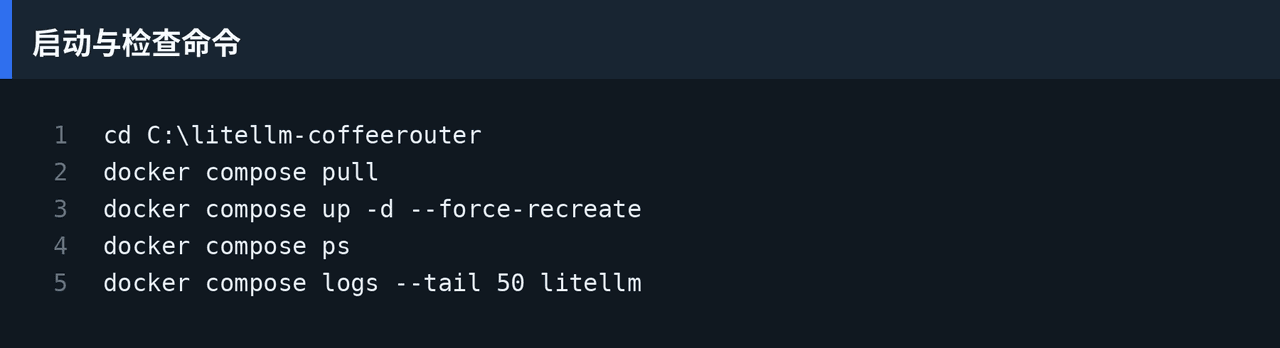
Start and inspect the container:
cd C:\litellm-coffeerouter
docker compose pull
docker compose up -d --force-recreate
docker compose ps
docker compose logs --tail 50 litellm
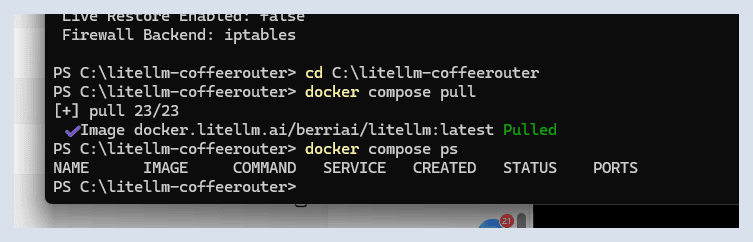
Verify that the master key is present without printing its value:
docker compose exec litellm sh -c 'test -n "$LITELLM_MASTER_KEY" && echo MASTER_KEY_OK || echo MASTER_KEY_MISSING'
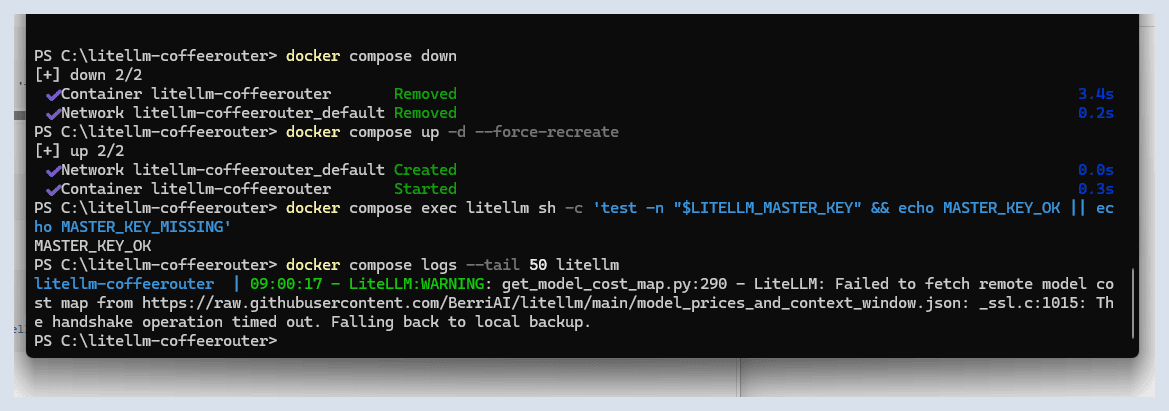
latest is acceptable for evaluation. Production deployments should pin a tested release tag or image digest for reproducible upgrades and rollbacks.
Failed to fetch remote model cost map means LiteLLM could not retrieve the remote cost map and fell back to its local copy. If model calls still work, the warning normally does not block basic chat. If calls also fail, check the network, proxy, and TLS certificate configuration.
06. Optional: verify CoffeeRouter directly
If LiteLLM reports an upstream error, bypass LiteLLM temporarily to verify the CoffeeRouter Base URL, token, and exact model ID:
$baseUrl = "https://www.coffeerouter.ai/v1"
$coffeeKey = "sk-your-coffeerouter-key"
$directBody = @{
    model = "MiniMax-M2.7"
    messages = @(
        @{ role = "user"; content = "Reply only with: CoffeeRouter direct connection succeeded" }
    )
    stream = $false
} | ConvertTo-Json -Depth 10

$directResult = Invoke-RestMethod `
    -Uri "$baseUrl/chat/completions" `
    -Method Post `
    -Headers @{ Authorization = "Bearer $coffeeKey" } `
    -ContentType "application/json; charset=utf-8" `
    -Body $directBody

$directResult.choices[0].message.content
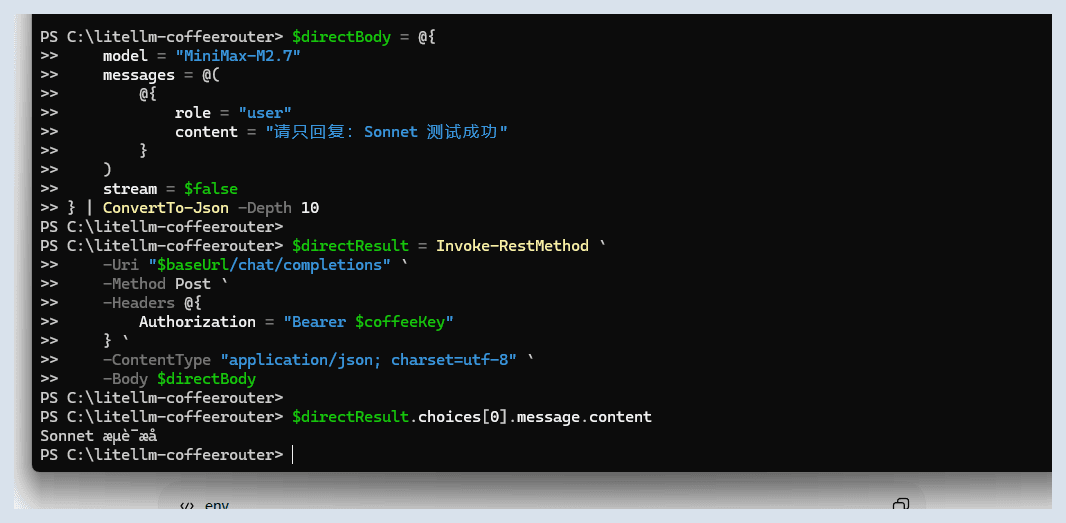
Clear sensitive terminal variables or close the terminal after testing. Do not publish command history or screenshots containing credentials.
07. Test the local LiteLLM endpoint
Keep LiteLLM running and open another PowerShell window:
$litellmKey = "sk-your-litellm-master-key"
$proxyBody = @{
    model = "coffee-minimax-m2-7"
    messages = @(
        @{ role = "user"; content = "Reply only with: LiteLLM connection succeeded" }
    )
    stream = $false
} | ConvertTo-Json -Depth 10

$proxyResult = Invoke-RestMethod `
    -Uri "http://127.0.0.1:4000/v1/chat/completions" `
    -Method Post `
    -Headers @{ Authorization = "Bearer $litellmKey" } `
    -ContentType "application/json; charset=utf-8" `
    -Body $proxyBody

$proxyResult.choices[0].message.content
This request must use the LiteLLM master key and client alias coffee-minimax-m2-7, not the CoffeeRouter key or the upstream model ID.
08. Connect ChatBox to LiteLLM
In ChatBox, open Settings → Model Provider → Add Custom Provider, choose OpenAI API Compatible, and enter:
| ChatBox setting | Value |
|---|---|
| Name | LiteLLM |
| API Mode | OpenAI API Compatible |
| API Key | LITELLM_MASTER_KEY from .env |
| API Host | http://127.0.0.1:4000 |
| API Path | /v1/chat/completions |
| Model | coffee-minimax-m2-7 |
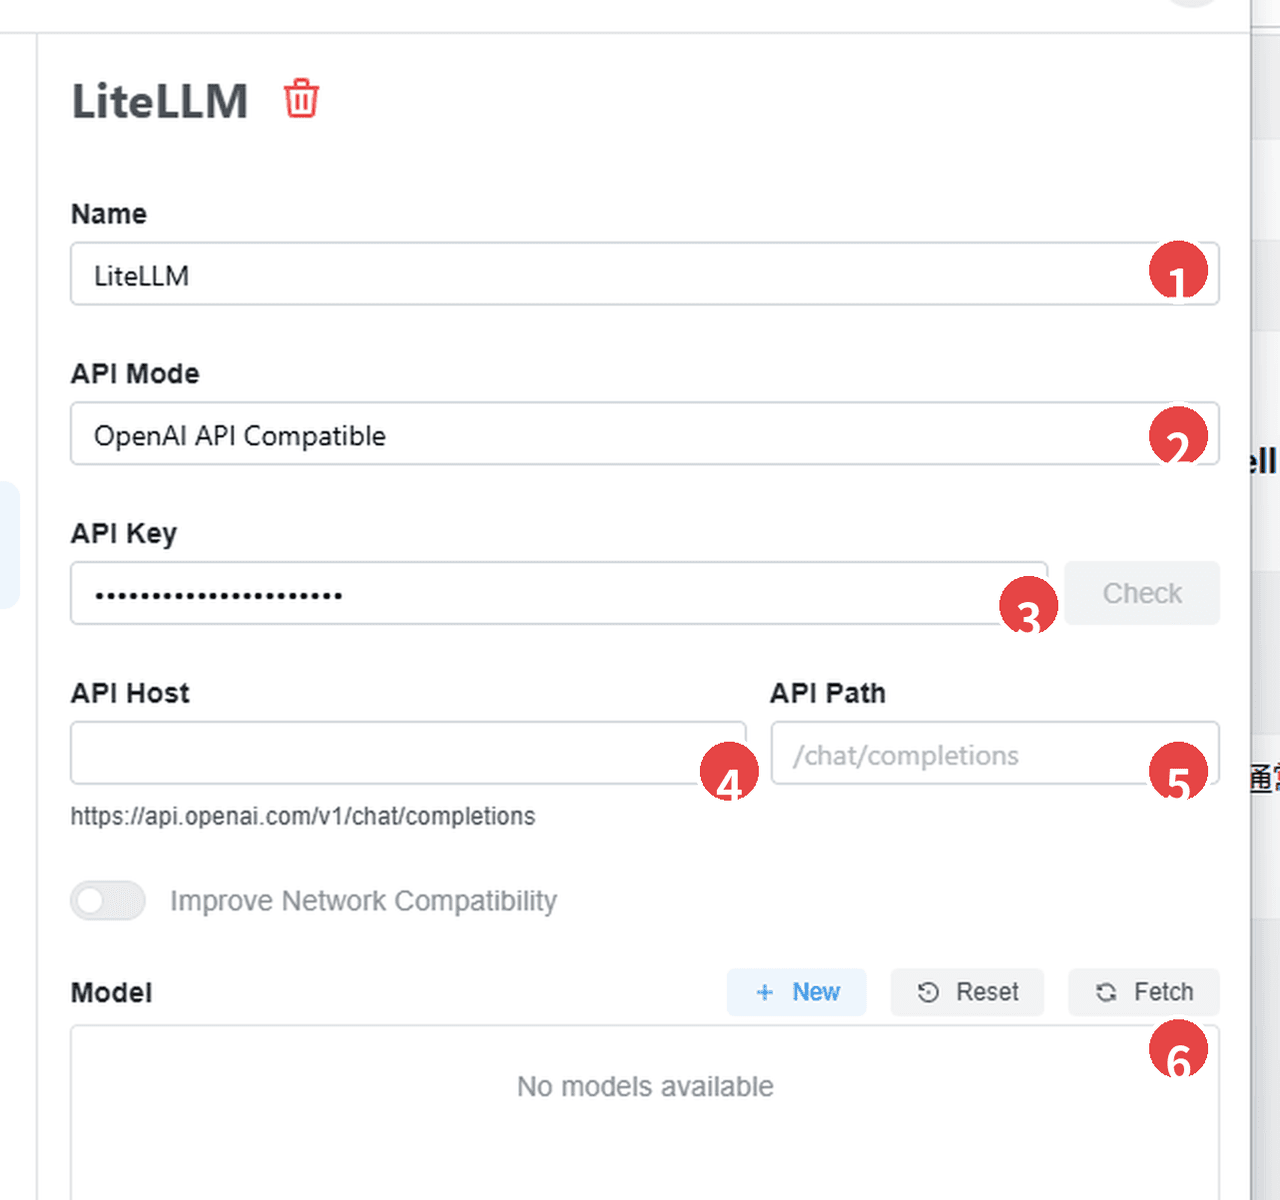
Select Fetch, or add coffee-minimax-m2-7 manually. Save the provider, return to the chat screen, select the model, and send a test message.
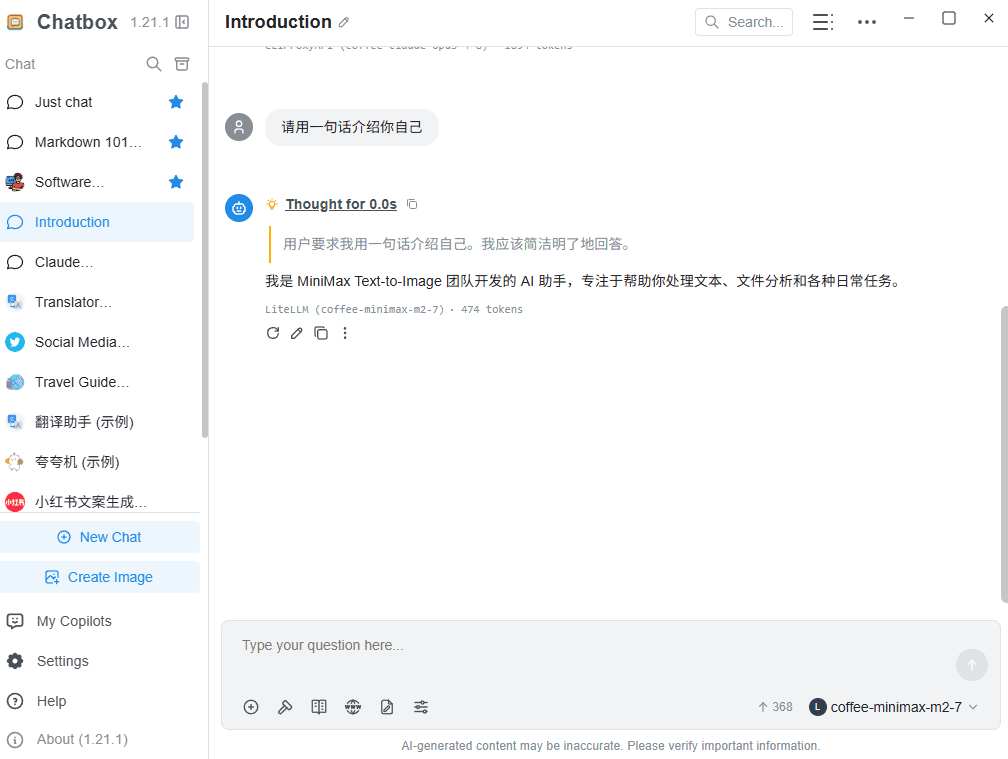
ChatBox stores only the local LiteLLM master key. Do not enter the upstream CoffeeRouter token in ChatBox.
Troubleshooting
Why does ChatBox report connection refused?
Make sure the LiteLLM process or Docker container is running and that API Host is http://127.0.0.1:4000. If ChatBox runs on another device, 127.0.0.1 points to that device itself, not to the computer running LiteLLM.
Why does LiteLLM return 401?
If the request never reaches CoffeeRouter, verify that ChatBox uses LITELLM_MASTER_KEY. If the logs show an upstream 401, verify that COFFEEROUTER_API_KEY is complete, active, unexpired, and has available quota.
Why is the model reported as missing?
ChatBox and local proxy tests must use the model_name alias coffee-minimax-m2-7. The value after openai/ in config.yaml must exactly match a real model ID allowed by the CoffeeRouter token.
Why did changes to .env or config.yaml not apply?
Stop and restart LiteLLM. For local execution, start it from the configuration directory. Docker users should run docker compose up -d --force-recreate and inspect the container logs.
Can LiteLLM be shared over a LAN or the internet?
Yes, but that is outside this local quick-start guide. Use a separate master key, restrict the listener and firewall rules, and put the service behind an HTTPS reverse proxy. Never expose an unhardened port 4000 directly to the public internet.
Security
- Create a dedicated CoffeeRouter token for LiteLLM so it can be revoked independently.
.env, terminal history, and LiteLLM logs may contain credentials or request data. Do not upload or share them.- Clients should receive only the LiteLLM master key, never the upstream CoffeeRouter token.
- If either key may have leaked, revoke it in the corresponding system, update
.env, and restart LiteLLM.