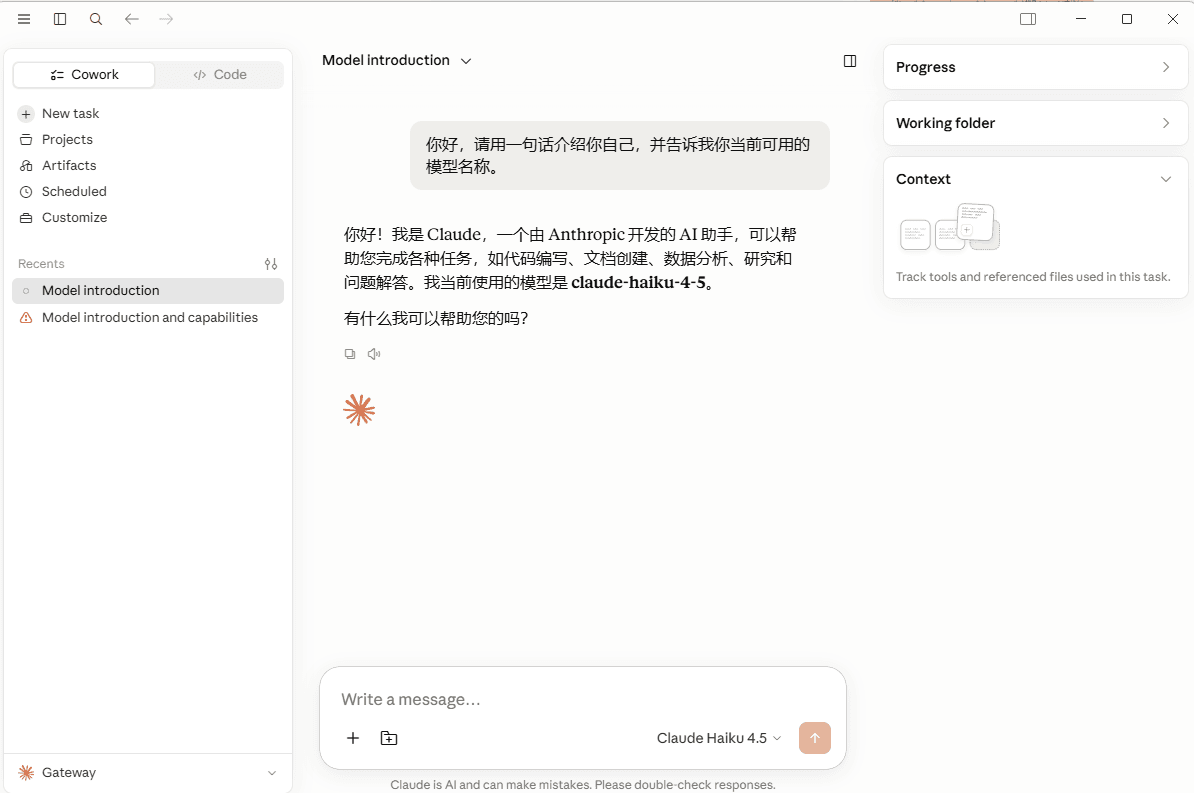

CC Desktop Switch
Configure CoffeeRouter in CC Desktop Switch, map models, apply the provider to Claude Desktop, and start local forwarding.
Follow these steps to add CoffeeRouter as a provider in CC Desktop Switch and apply the configuration to Claude Desktop.
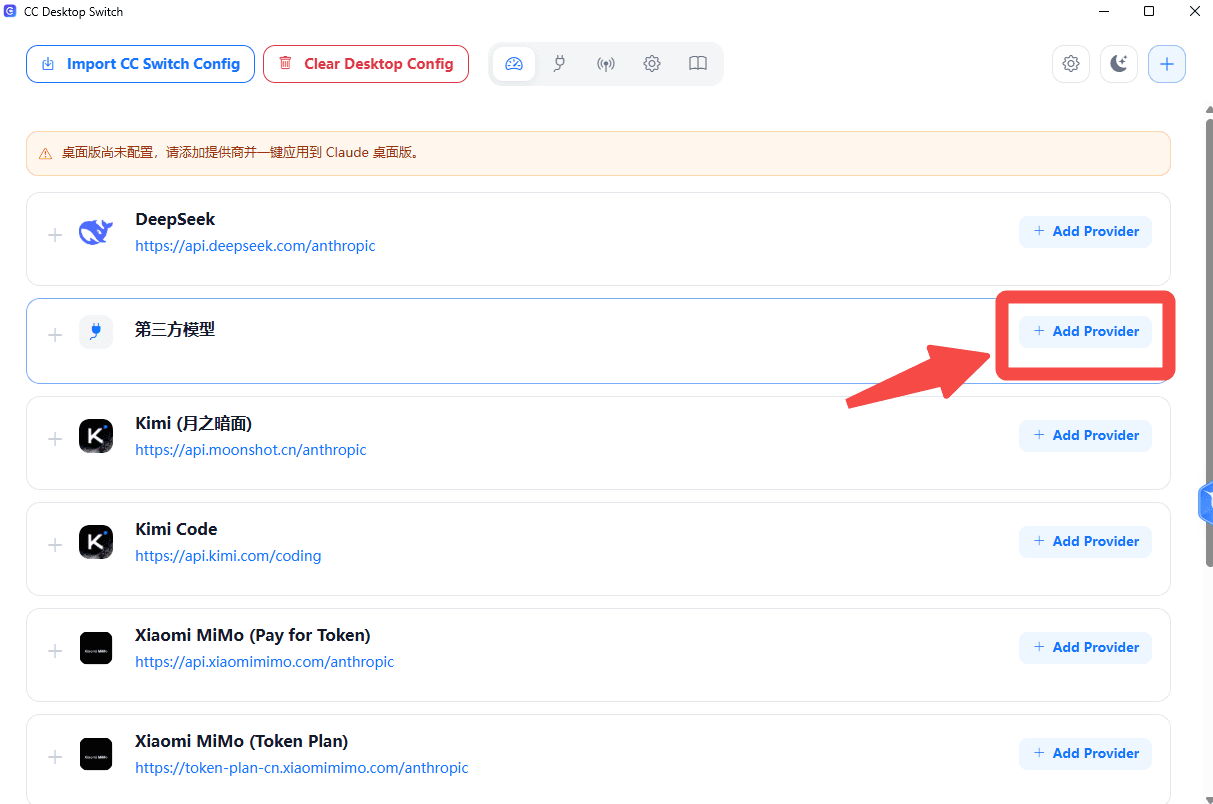
1. Add a Custom Provider
On the Providers page in CC Desktop Switch, find the third-party models section and click Add Provider.
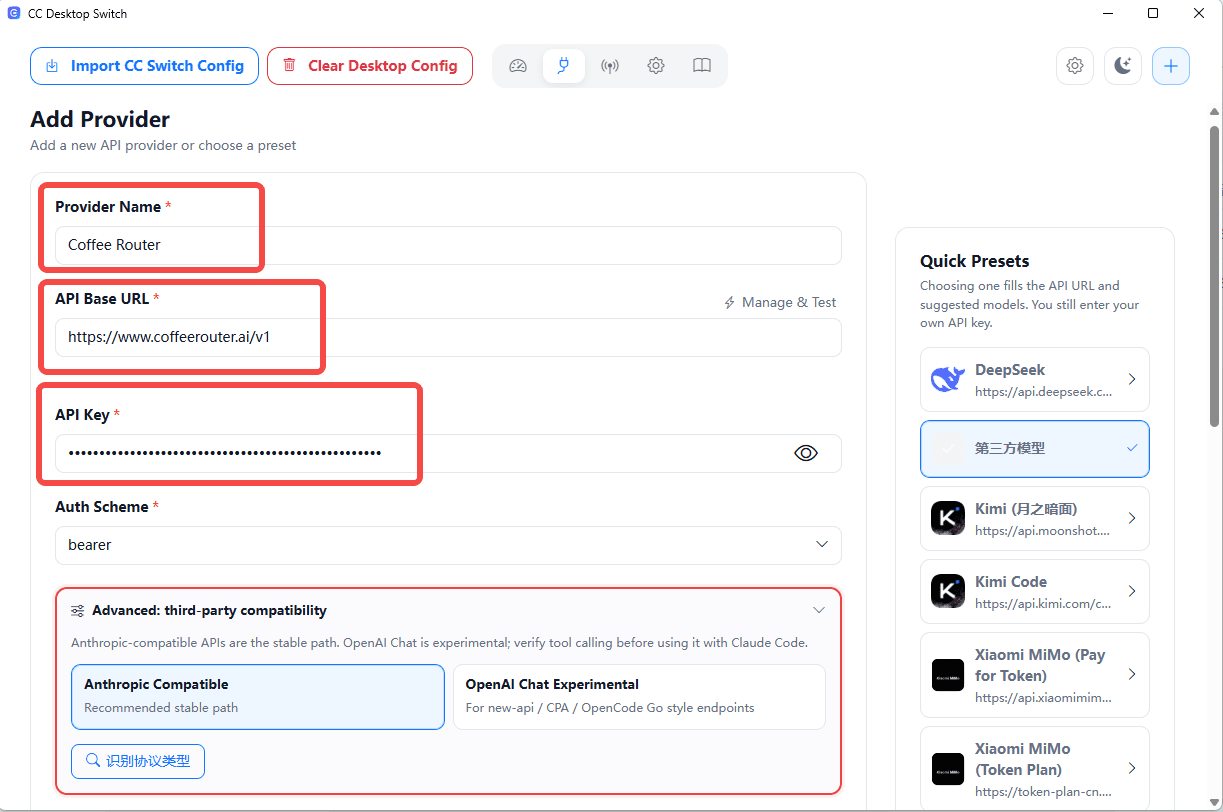
2. Configure the Provider
Enter the following information:
- Provider Name: Enter a recognizable name, such as
Coffee Router. - API Key: Obtain it from CoffeeRouter. The placeholder used in this guide is
sk-••••••••. - API Address: Enter the API address of your CoffeeRouter site. The official example is
https://www.coffeerouter.ai/v1.
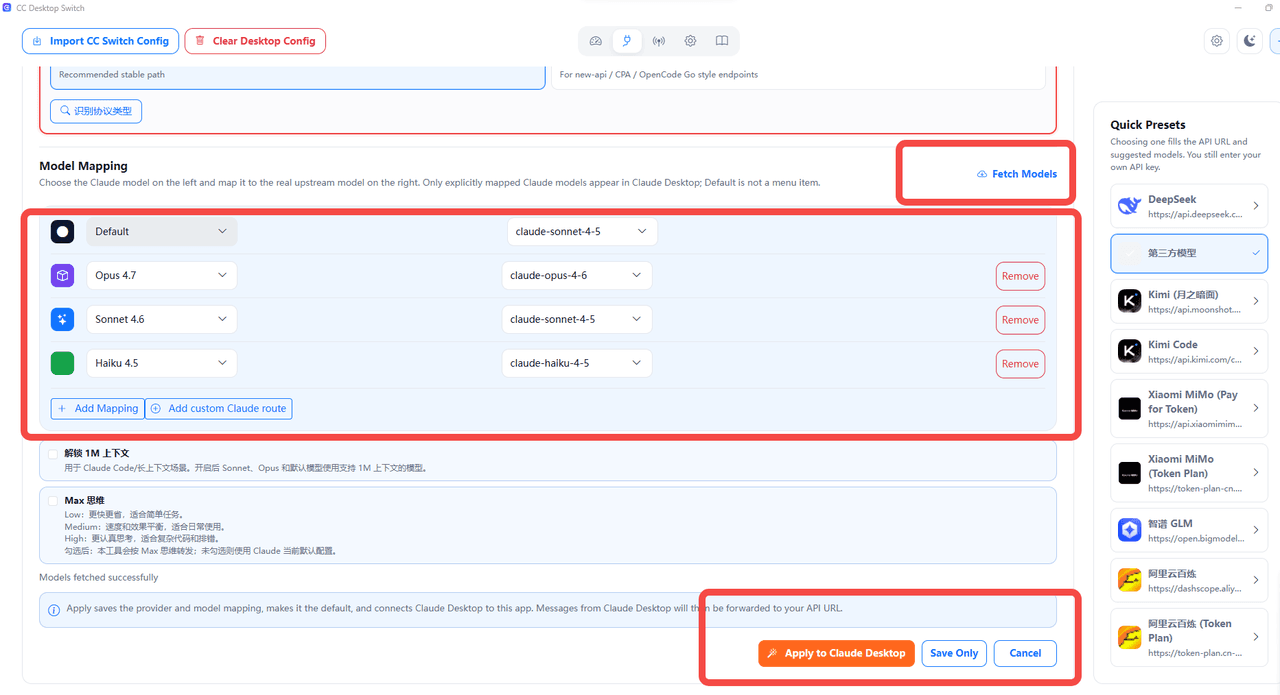
3. Fetch Models and Apply Them to Claude Desktop
- Select Fetch Models to retrieve the available models.
- Adjust the model mappings as needed.
- Finally, select Apply to Claude Desktop.
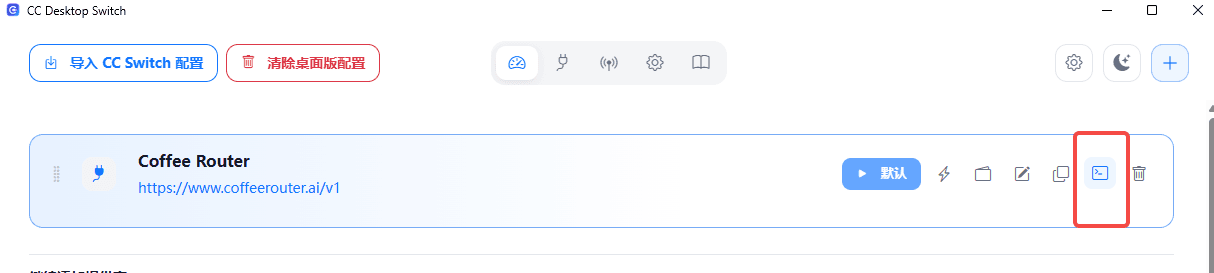
4. Open the Forwarding Page
Return to the Providers page and click the forwarding button on the right side of the CoffeeRouter provider.
5. Start Local Forwarding
Click Start Forwarding. Make sure that the local forwarding port in CC Desktop Switch matches the port used by Claude Desktop.
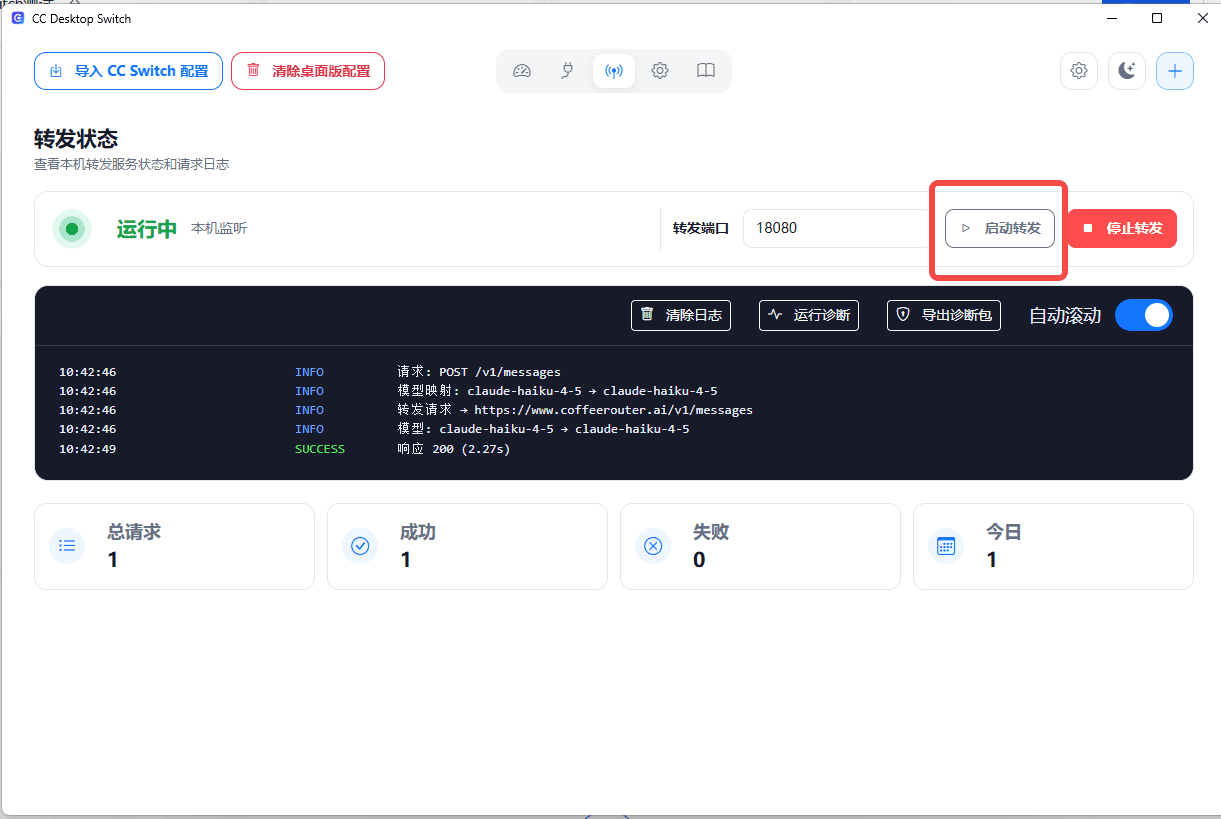
6. Test in Claude Desktop
Return to the Claude Desktop chat page and send a message to test the configuration.